Using the Rule of Thirds for Amazing Vacation Photos
Want to take gorgeous landscape photos your friends will love? Learn how the rule of thirds will help you capture breathtaking vacation photos.
Taking better pictures doesn’t require a better camera. If you want to take breathtaking photos of your next vacation or family adventure, the real key is finding good light and using better composition. You’ll find quicker success using just whatever camera you have with just a little help.
I believe that basic rules of photography are important for everyone in the family to learn. Moms are usually the Head Photographers of All The Things but when dads and the kids have stronger photography skills, everyone can take turns capturing their unique perspective of your trip and your memories will be far richer.
Some of my favorite photos have been captured by my kids using just my iPhone.
I wrote this lesson so it would be easy enough for even your kids to learn something new. This would be a fantastic lesson to share with your entire family before you head out on your next family vacation or weekend adventure.
Let me know how it goes!

How to use the Rule of Thirds to take better family pictures:
The “Rule of Thirds” is usually one of the first composition lessons taught in most photography classes. It is the easiest photography rule to remember and put into practice. The important thing to remember is that it really is more of a guide.
Sometimes, rules are made to be broken. You just need to understand them before you play with them.
Basic photography composition:
Composition: The way the objects and scene within the photo are arranged.
A good composition will help someone to understand the main purpose of your photo. A weak composition will lead to confusion: What is this photo about? What am I trying to look at?
As the photographer, you control the final design of your photo. Where you stand and how you angle your camera will make all the difference. As you get started, the Rule of Thirds will help to guide you in angling your camera in just the right way.
The Tic-Tac-Toe Photography Game:
The Rule of Thirds is like playing a giant game of Tic-Tac-Toe. Imagine laying the lined grid you use for Tic-Tac-Toe over the entire world. The goal of this game is to capture objects on the grid in just the right places.
If you’re having a hard time imagining this, I have great news — most cameras have the rule of thirds grid already laid out on your viewer! My iPhone camera definitely has it. It was an optional setting on my DSLR, you may just need to check your camera manual to see how to turn it on.
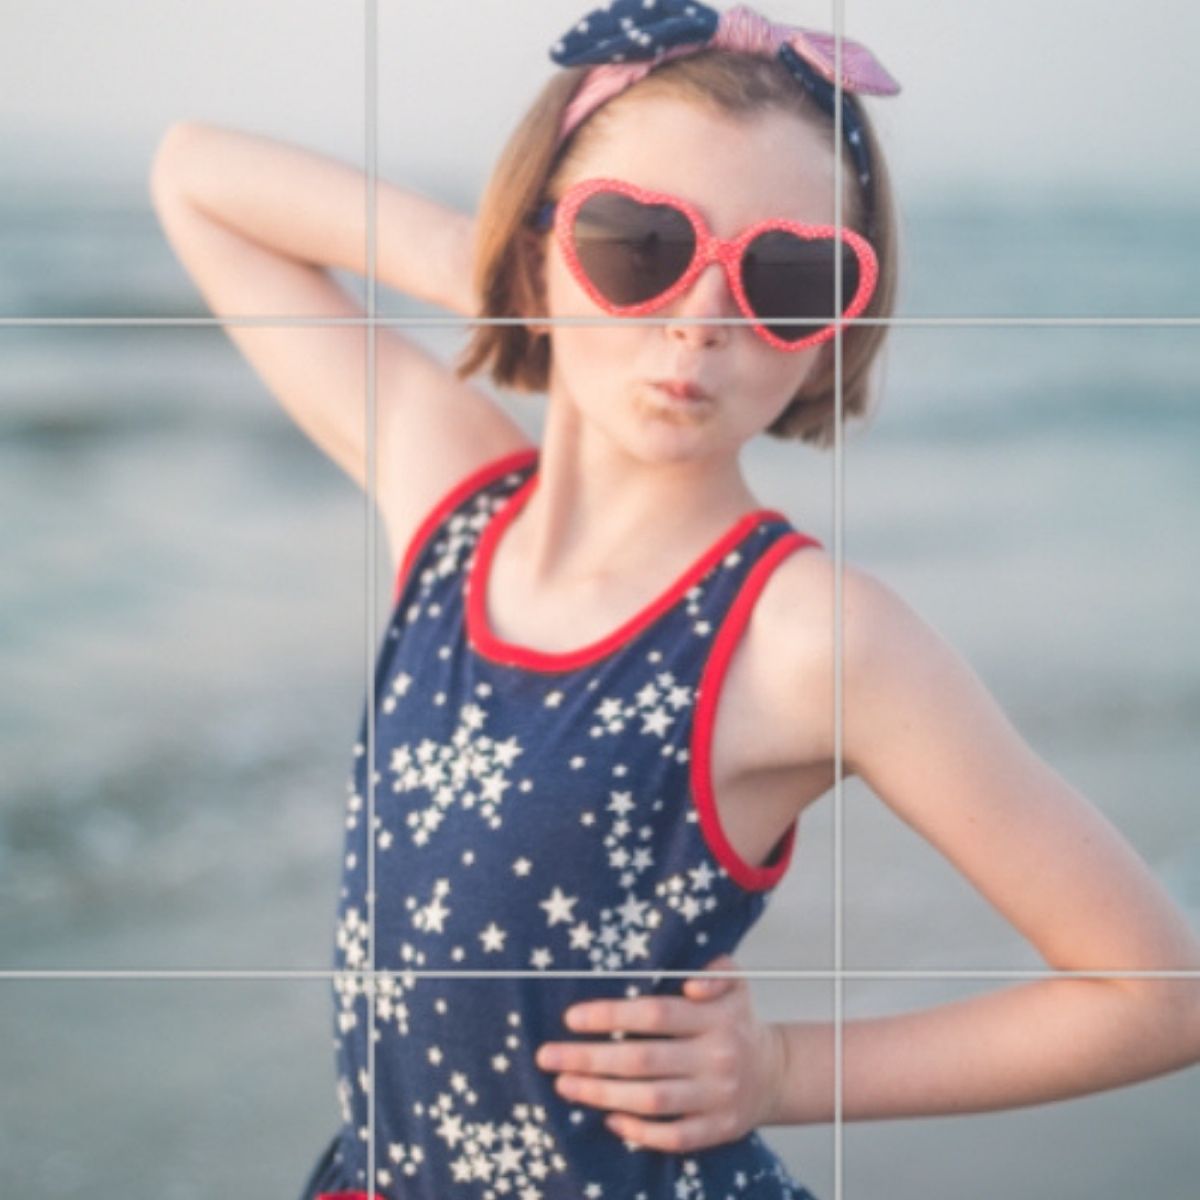
Here’s an example of what the composition grid looks like on a photo I captured of my daughter at the beach:
See the faint lines criss-crossing the image? They divide your photo into 3 rows and 3 columns. That’s where the “thirds” part of the rule comes from.
Your goal is to put the most interesting part of your photo at strategic spots on the tic-tac-toe grid.
The strategic spot you need may change from subject to subject. Let’s look at some specific examples together.
Using the Rule of Thirds for better landscape photos:
When you are outside taking photos of a big, wide scene, you are likely looking at big objects right in front of you and not necessarily at the sky.
Where the sky meets the land or water is called the skyline or horizon. Ignoring the skyline is a common mistake many photographers make.
You want to make sure that the skyline falls along one of the two horizontal lines of the grid. When the skyline falls in the middle of the photo, it cuts your picture in half and isn’t as pleasing to the eye.
Look at the difference between these three photos and think about what each one tells you about it’s story:
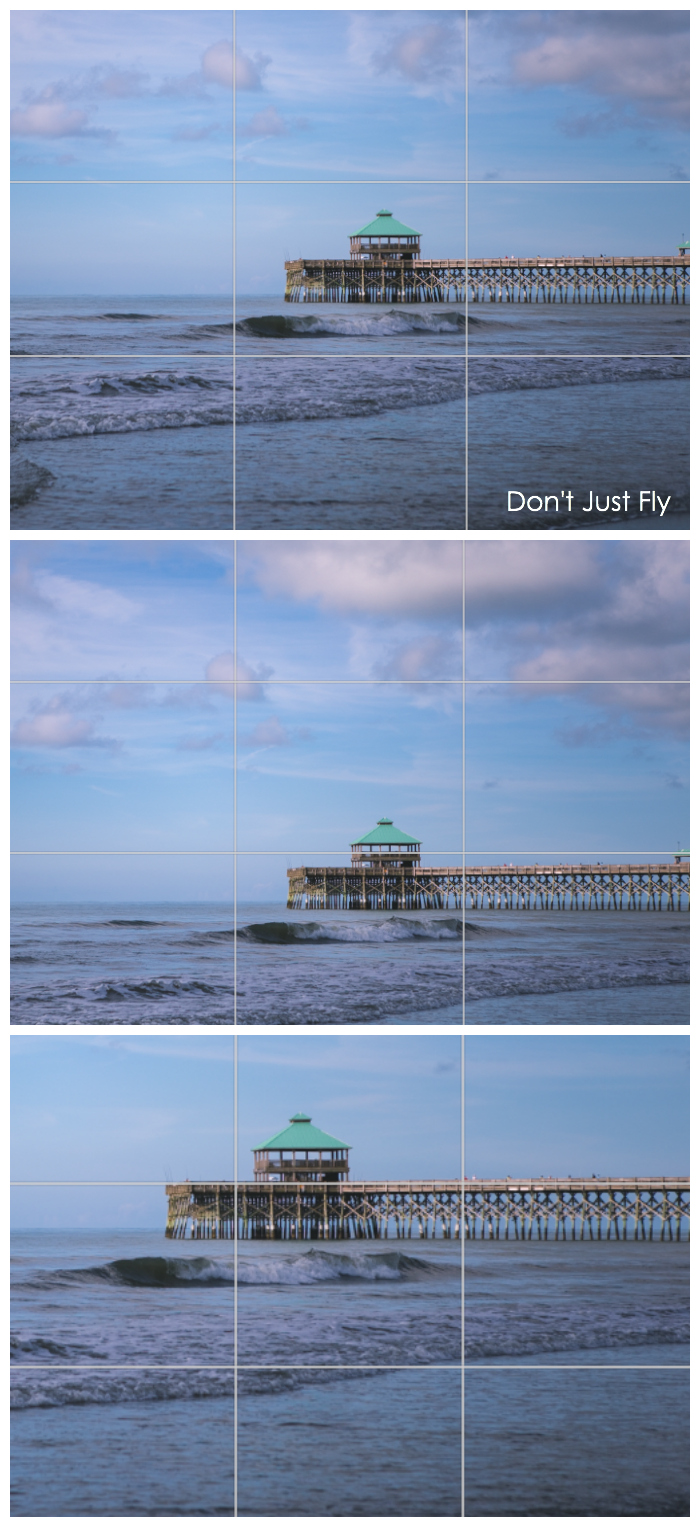
- The photo at the top has the horizon line in the middle: Is it a story of the sky or the water? Which one is more important?
- The middle photo has the skyline along the bottom horizontal line: This photo definitely tells us how big the sky is at the beach.
- The bottom photo has the skyline along the top horizontal line: This photo definitely tells us the waves along the pier are HUGE and is a story of the ocean water.
Here are a couple more examples of using the skyline to arrange a great photo composition.
The Folly Beach Pier:
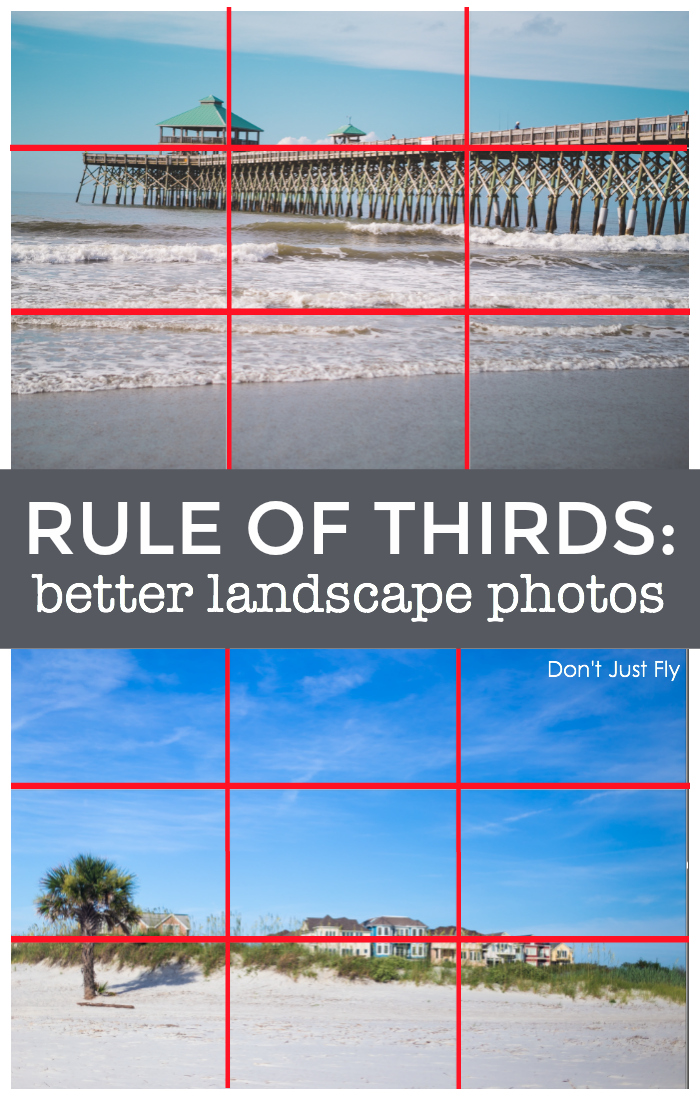
I placed the green gazebo at one of the intersecting points of the grid. The pier itself runs along the top horizontal line of the grid. This leaves the bottom two-thirds of the picture to show the ocean waves and beach sand.
I could also have put the pier along the bottom horizontal line which would leave the top two-thirds to show the bright blue sky.
Either one of those compositions would be great and fit the rule as you saw in the example just before this.
As the photographer, I know I’m in charge of telling the story with my picture, so I chose to put the pier at the top of the photo and show the waves because I wanted to remember our trip to the beach and how much we love the waves.
Beach houses at Hilton Head:
In this case, the beach houses, grassy dune, and the palm tree are dotted along the skyline. It would be easy to ignore it if I was too-focused on the houses themselves.
I placed the skyline on the bottom horizontal line of the grid because our day at the beach was so bright and beautiful, I wanted to remember how big the sky feels when we are at the ocean.
If I had walked a little bit more to the left, I could have angled my camera to put the palm tree on the bottom-left intersecting point of the grid which would have followed the rule of thirds even better.
But, the point is to get better photos while still enjoying your vacation, not drive yourself crazy following the rules 100% perfectly.
Using the Rule of Thirds to show motion:
Even though photos are a still frame shot of your day, they can absolutely show motion. Look at these examples:
Girls walking on the beach path:
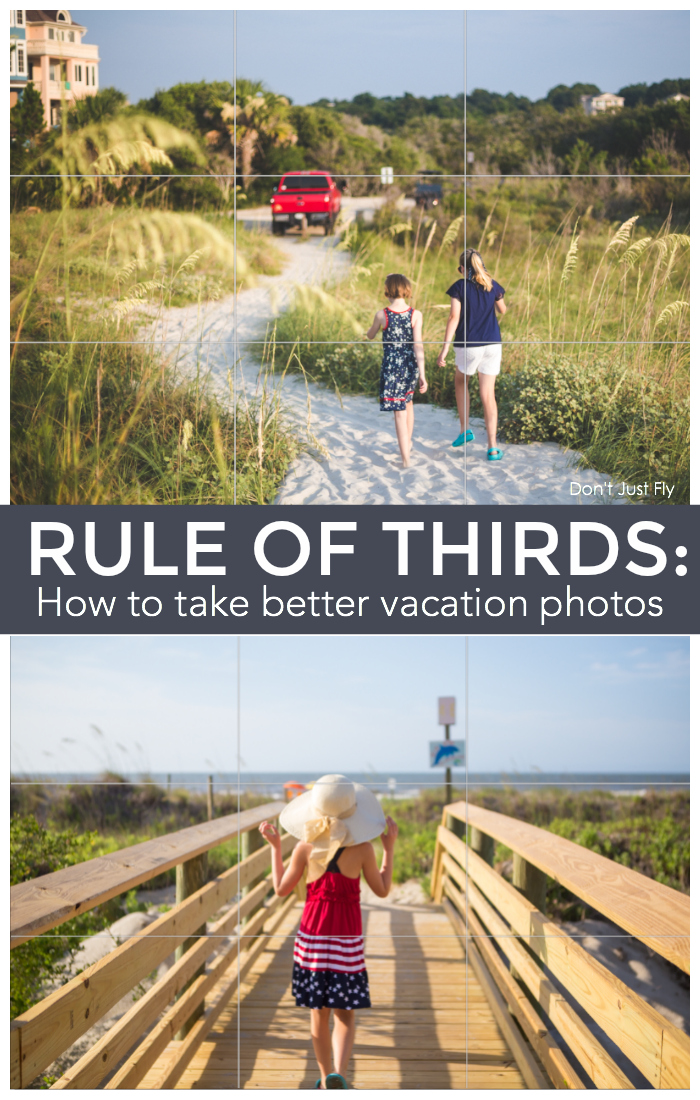
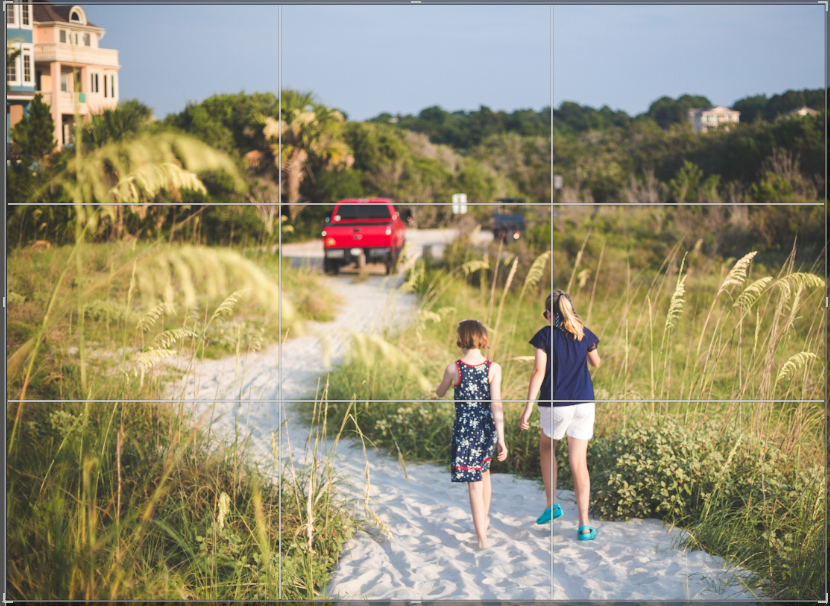
I loved the curvy path coming back from the beach. I placed my daughters in the bottom-right intersecting point to show that they are important to the photo. The curvy path moves from them over to the bottom-left intersecting point and then up to the top horizontal line.
The path fills the entire bottom two-thirds of the photo but moves from right to left and back to center. The girls are moving from right to left along the path.
Looking at this photo, your eye tells you which way the girls are going to go. You know they’re going to end up at the fun, bright red truck at the end of the path. This is a great example of movement in a still photo.
The rule of thirds can help you to make better decisions when capturing your story. Take a peek at this example.
Boogie boarding on the beach:
In this photo, my daughter is looking for the next wave to come along. You want your main subject to fall along one of the grid lines so I had the choice to put her along the vertical left or the vertical right lines.
If I put her along the left line, she is looking towards the edge of the picture. We can’t see what she is looking at and we feel a little tension or worry not knowing what is there.
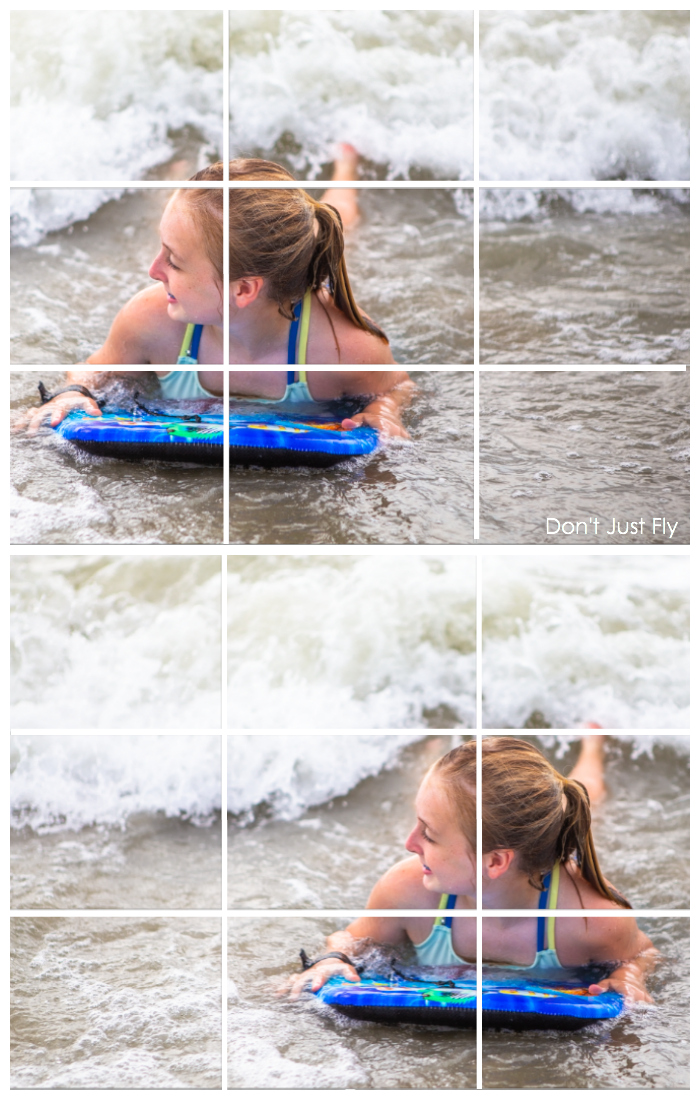
BUT, if I put her along the right vertical line, we can see her looking at the wave and the entire composition feels more relaxing and comfortable to us as the viewers.
The motion of the waves and the motion of her gaze are both helped by knowing the rule of thirds.
Using the Rule of Thirds to take better pictures of people:
When you travel together as a family, you’ll capture lots of photos of the places you go. You’ll also want to remember that you were there together.
Taking pictures of your family can be a little easier when using the Rule of Thirds grid. Let’s take a look.
Silly portrait at the beach:
I love to take portraits of my girls when we go to the beach. We always take one morning to get up a little earlier and go down to the water while the light is soft to take photos together.
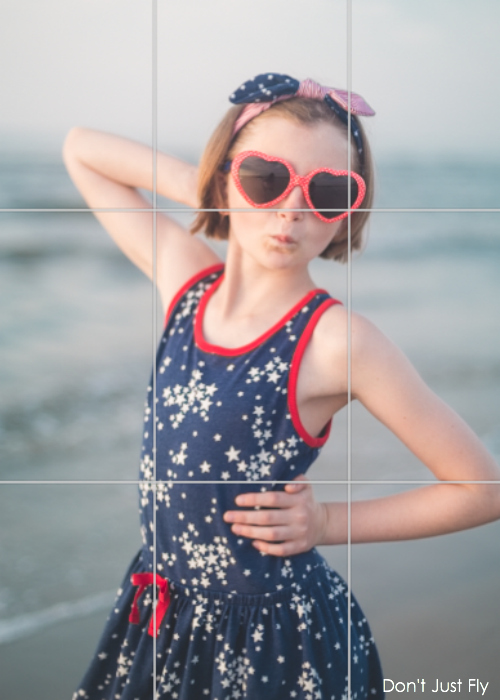
When taking a picture of one person, you DO NOT want to put their face in the middle square of the grid.
Instead, I placed my daughter’s head along the top horizontal line and had her body fill the bottom two-thirds of the photo. The photo is all about her.
If I put her face in the center square, a full third of the photo would show sky and you might wonder what the most important part of the photo is. Is it a picture of my daughter? Or is it a picture of the day at the beach? The story wouldn’t be as strong as it is when my little lady fills most of the picture space.
A picture of two girls jumping at the beach:
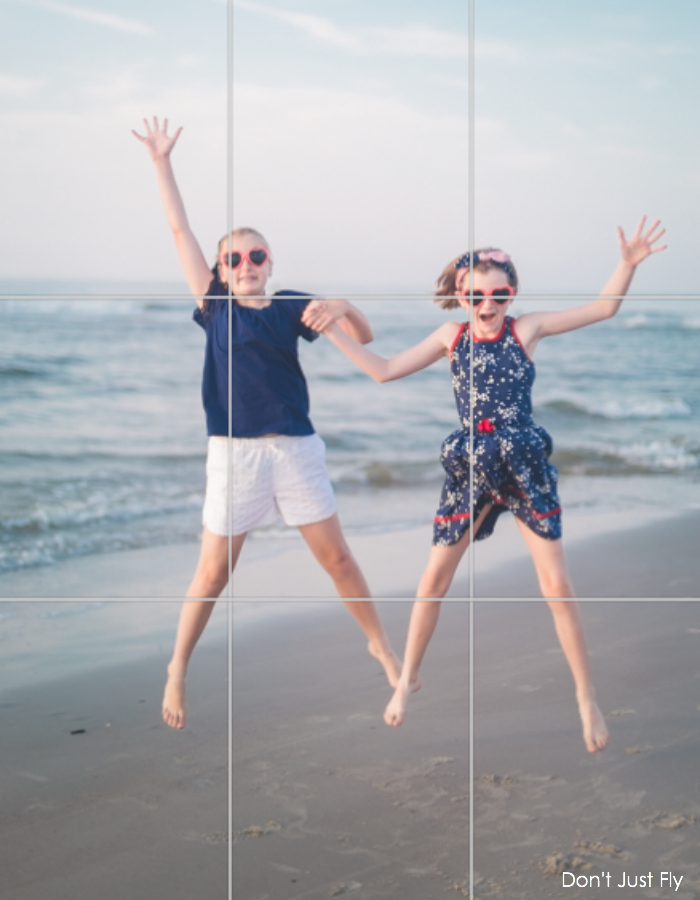
Jumping shots are totally our thing. We love to show our excitement with a big, dramatic jumping shot.
There are several Rule of Thirds tricks going on in this photo:
- The skyline is along the top horizontal line.
- Each daughter’s face is placed on an intersection point.
- Their bodies both fall along both of the vertical lines.
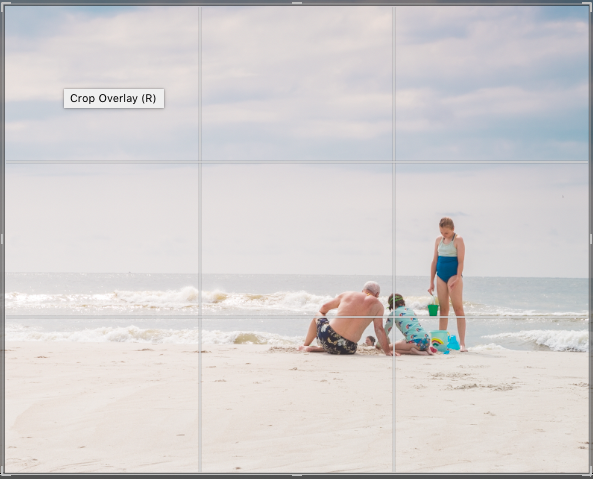
Family playing in the sand on the beach:
My favorite thing about the Rule of Thirds is how it can help guide you in capturing the bigger story of your adventure.
During our trip to the beach, my girls built sandcastles with their grandpa. It was one of their favorite memories from the trip. I got up super close and took several pictures of them together where we can see the castles, the buckets, the smiles on their faces. We know they are at the beach in those photos because they are wearing swimsuits and sitting on the sand but we don’t see the ocean or sky.
As I walked back to my beach chair to sit and read, I noticed just how pretty the sky was and how soft all the colors of the sand, ocean, and sky were together. The weather was lovely that day. So I wanted to capture a far-away photo of the castle-building trio.
I placed my family at the bottom-right intersecting point so that you know they are the most important thing in this scene.
The real skyline cuts through the middle of the photo but the blue section of the sky above the beachy haze falls along the top horizontal line while the place where the ocean meets the sand falls along the bottom horizontal line.
Once you start applying the Rule of Thirds to your photos, you will begin to notice things in your background that you didn’t before. You will become more aware of your surroundings and be on the look-out for new, fun ways to tell your story.
Photography Lessons for Kids:
If your child is interested in learning more about photography, you might be interested in:

One Comment